Gardens offer a nearly endless supply of wonderful materials for photographers. However, if your area of photographic expertise is more industrial, for example, then obviously I appreciate that you might not initially be attracted to photographing gardens. I actually think you are missing out and hope that you will at least consider the possibilities.
Garden photography not only offers you stunning opportunities to make some beautiful images, but it’s probably one of the closest ‘shoot locations’ to home that you’ll have. It offers you excellent opportunities to practice and hone all of your photography skills.
With Garden photography, you can practise so many skills including:
- Lighting conditions, harsh light, heavy shadows, direct light, dynamic and changing light
- Dealing with moving objects (bugs, windswept flowers, birds and stray cats?)
- Consideration of backgrounds and composition
- Handheld skills and tripod practice
- Experiment with all your camera settings (shutter speeds, apertures, ISO’s etc)
- The depth of field (how much of your image is in focus)
If you feel you could have done better just try again and learn from your mistakes. Remember we don’t generally learn from what goes right, but how we deal with what went wrong! No experience is a waste of time as all the skills you are practising have just as much relevance in other photography genre’s.
Our gardens are often not that big so look for details and angles to express your style. It’s all very well to take photographs of the whole garden but most of us don’t have acres of outdoor space and, creativity wise, it can soon become a little monotonous. The good thing with looking for details is that your options are almost endless and, taken creatively, your images can look like they could be from anywhere in the world.
Gardens have obviously been photographed a lot, some might even say too much. So, with that in mind, use your creativity to come up with ways to produce images that are unique.
Top garden photography tips:
Plants swaying in the wind can look great, but can also be a nuisance when you specifically don’t want the ‘blurred swaying’ effect. To mitigate this, try increasing your shutter speed. Obviously, I find it easier to pick a calm wind-free day, but that’s not always possible, so when it is too windy for shooting detailed images, I use a clear plastic box lid to help deflect the breeze around the chosen subject.
An object about 500mm wide or high that you can usually pick up from a DIY store. A clear lid will still allow light through and lessen issues with shadows. You can also use a clamp on a flexible arm to hold things still in the garden. These are often called ‘plamps’, type that into your search engine to find them.
Try using a cheap reflector to bounce daylight into, or under, dark areas. Use various coloured reflectors, i.e. silver and gold, for different effects. A gold reflector will make an image seem warmer but it also might alter the colours in your image slightly. For example, take some images from underneath tall plants, looking up at the sky with a wide-angle lens. A cheap reflector can light up the dark area underneath the plants.

Asters view from a worms eye by Simon Bratt – Canon 5dMk2, Canon 16-35@16mm lens, f4, 1/1000, ISO400, Handheld
You can also introduce flash photography and place one or two wireless speed lights behind, around or even in the middle of the plants. Use coloured gels over the flashes for some cool effects or even a polarizing lens filter cap.
The best time to get out in the garden is early morning or late evenings when the sun is less harsh. It is more flattering to the flowers, produces less harsh shadows and is a warmer light. The other advantage with an early morning is that bugs are often asleep in the early mornings. It is funny to see a bee asleep in the middle of a flower head, but a still bee really helps get a sharper photograph. This bee below was asleep, eventually, they fly off.

White-tailed bumblebee macro sat on a pink Aster by Simon Bratt – Canon 5dMk2, 100mm Canon macro lens, f9, 1/50, ISO800, Handheld Image Stabilised
Spraying mist to make water drops on plants also adds another dimension to some images, It can look like early morning dew, or just after the rain has come. Don’t overdo it though, if every image you make has water drops on, it will lose its magic. I used to use a cheap little spray bottle which was perfectly fine, but now I use a larger pressurised spray container as it produces a finer mist over a larger area.
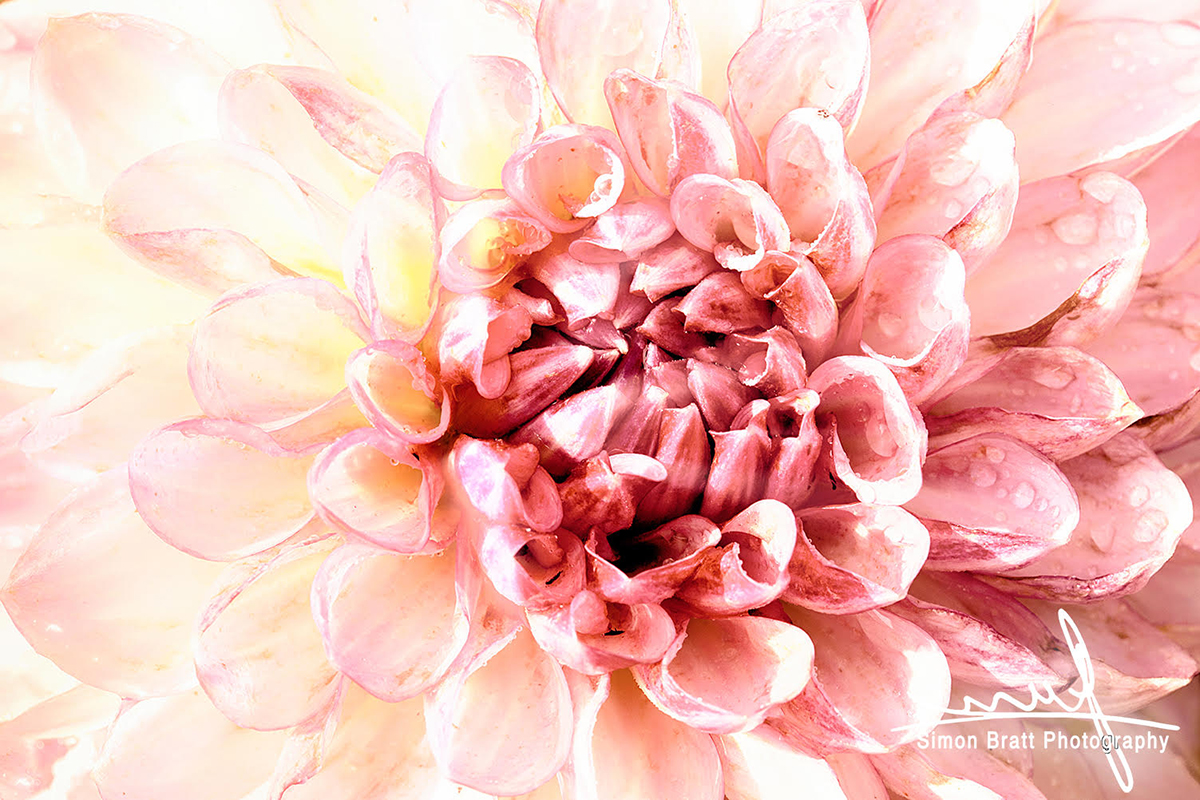
Stunning pink Dahlia flower head close up – Canon 5Dmk2, Canon 100mm Macro Lens, f16, 1/60, iso 400 Handheld Image Stabilised
It’s worthwhile taking a walk around the area before you start taking shots. See if anything needs tidying up or staking or even if you need to ‘stage’ your image a little.
Visit your garden regularly as plants and flowers can change dramatically, often within a very short space of time. Take images from the same viewpoint every few days and see the differences!
After the flower petals have fallen some plants have amazing seed heads which are great subjects for macro photography. Flower buds too can be quite intricate. Usually, these buds are overlooked as everyone waits for the main show of the flowers, so look carefully at young plants.
Whilst flowers are generally the showstoppers in the garden don’t underestimate the beauty of foliage. The effect of different light on leaves through the seasons can make breathtakingly beautiful photos.
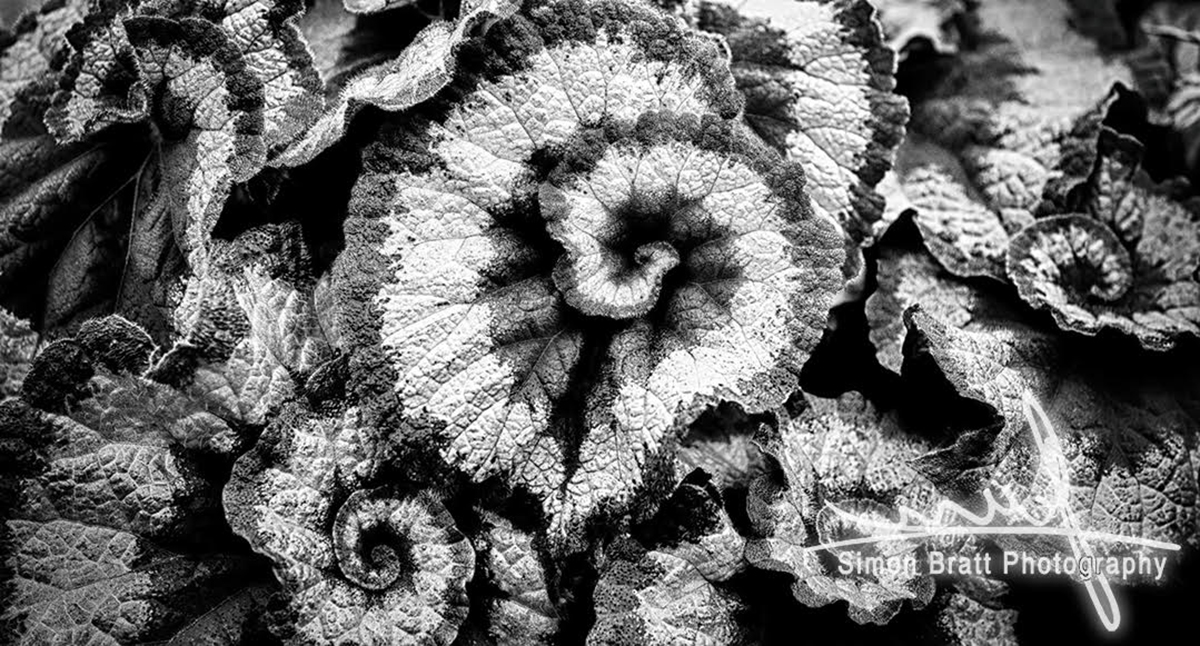
Begonia leaves pattern – Canon 5Dmk2, Canon 70-200@200 Lens, f4.5, 1/100, iso 400 Handheld Image Stabilised
Grasses and barks bring their own personalities too. They can be tall or small and can look delicate or majestic. Swaying dried grasses can look wonderful. Notice the amazing bark patterns on even the most common trees.
Remember not to only consider your garden on dry sunny days; the haunting effects of early morning mist or fog can be quite dramatic or a layer of snow which totally alters the whole aspect. Play with whatever the weather throws at you.
Introduce non-plant items into the composition to help tell a story or add intrigue. Old pots, garden ornaments, garden tools etc. can all add to a scene. Be careful that what you are including is adding something to the composition of your image.
Spend time at a public garden or park. If you know another photographer, try swapping gardens for a couple of hours and compare their images to yours. We all see things differently, and you can learn an awful lot by seeing the same thing through someone else eyes.
Think about the final colours of your images. Colour photography is great but scenes in black and white can look incredibly striking and almost alien-like.
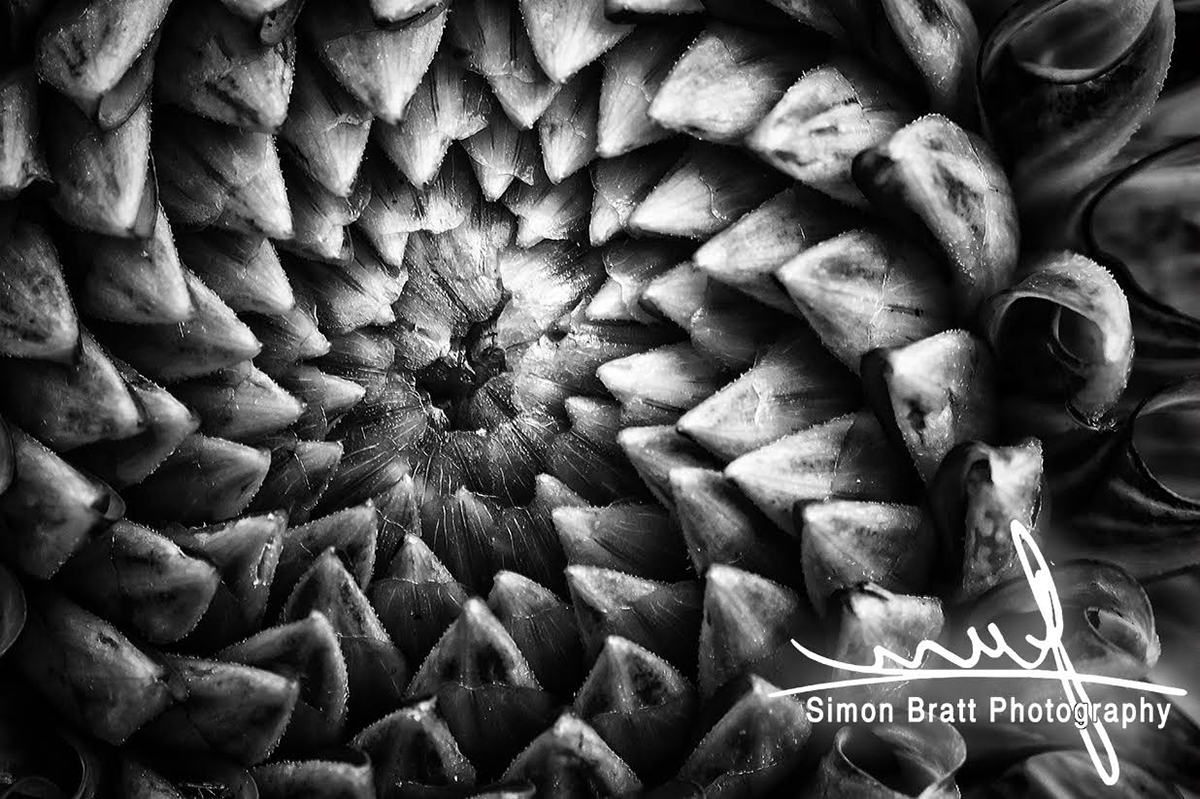
Monochrome Dahlia flower head pattern – Canon 5Dmk2, Canon 100mm Macro, f11, 1/50, iso 800 Handheld Image Stabilised
Always with permission, consider cutting flowers, leaves and petals, to create your own abstract image or montage of plant parts. Make a single flower from many different petals from different plants. Be your own botanist and photograph the results.
Create an area for bugs. This can be a small shop bought wooden ‘Bug Hotel’ or you can make your own, like this, ‘Home Made Bug Hotel’. Plan carefully where you place this as you don’t want to move it when it’s occupied. Consider when it will be in the sun because you’ll want to photograph the occupants ‘busy at work’ with some flattering early or late sunlight.
Garden birds are a whole other topic, but try to create a feeding area for them. Choose your bird food depending on what type of birds you want to attract. If you are not too sure, you can’t go wrong with some ‘sunflower hearts’ (not sunflower seeds). Set up a bird feeder near a house or shed window, maybe use a little netting or screening inside the window and you will be right next to the birds, in the dry, comfortable and with a cup of tea to hand. If you are very keen I can recommend using a wireless remote for your camera which allows you to set up your camera near the birds and you can trigger the camera from up to 100m away. Here is a garden bird image I created this year. I was delighted to hear that it earned a ‘Commended’ award in the International RHS Competition this year.

Blue Tit eating a red apple – Canon 5Dmk2, Canon 100-400Mk2@400 Lens, f13, 1/500, iso 800 on a Tripod
Go into your garden at night, with a bright torch. You might be amazed at what you can find to photograph. Have someone else hold the torch or tape it to a small light stand so you don’t have to hold it. You can also use a head torch.
If you are really interested in garden photography, consider planning what you might plant to make a series of amazing images. Look at plant catalogues and see the vast array of plants which can form your palette for next year. Go to garden centres for ideas and take photographs of plants and flowers on display. For those non-gardeners amongst you, consider using ‘annuals’. These are plants which only live for one season and then die. The advantages of growing annuals in pots or borders are that they are inexpensive, easy to grow and, importantly, you can massively change your landscape every year! The only limitation is your imagination!
Author Bio: Simon is a passionate full-time UK photographer across many different genres and has been selling his craft and images for over 10 years to commercial and private clients. His website, www.simonbrattphotography.com is a beautiful showcase of his work, as well as an online shop to buy some of his creations. “I love my work, and even now I still get just as much pleasure from creating every image, I am very lucky.”












An interesting article Simon, Thank you. I think I will get a plamp, if just for the cool name.