
All photographers make mistakes when first starting out and this is part of the process in learning what works and what doesn’t, but even professionals after years of experience make mistakes. The key to preventing mistakes is to know what key things to look for and checking your photos carefully after each shot to correct the mistake.
#1 Blurred Photos
A blurred photo is possibly the biggest issue you’ll face and will likely ruin your photo, so here are some of the most common reasons for this and how to prevent them.
 Holding the Camera Wrong
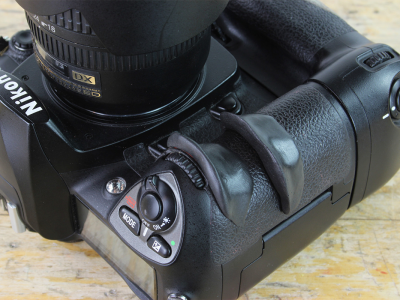
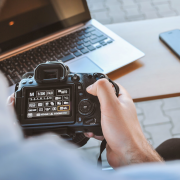
Knowing where to position your hands on the camera is an important practice you’ve probably already learnt (note this only applies to cameras with lenses). A good grip on your camera will stabilize your camera and reduce the amount it shakes, and besides this holding, the camera wrong can be uncomfortable and impractical. Some beginners will hold the camera with one hand on each side like you would hold a compact camera, but in this position, the weight of the lens will pull the front of the camera downwards and so the answer is to balance the weight of the lens and camera body. The way you should be holding your camera is by placing one hand on the right side of the camera body so your finger is within reach of the shutter button and then placing your left hand on the underside of the camera lens.
Slow Shutter Speeds
Handshake blur can’t be completely eliminated because our hands naturally shake to a degree, and this will be obvious if the shutter speed is too slow. As a general rule, you should aim for a shutter speed of at least the focal length of your lens, for example, if you’re using a focal length of 60mm you’ll need a shutter speed of 1/60 s as a minimum or if you’re using a focal length of 250mm then your shutter speed should be at least 1/250 s. The best way to speed up your shutter speed is by increasing your ISO or as an alternative use wider apertures.
Dark Conditions
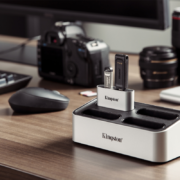
Blurry photos are common in dark conditions because the shutter speeds you need will be slower. There’s a couple of options for combating this, and the most simple one is just increasing your ISO which will speed up the shutter speed, but often in dark conditions, you’ll need to increase this to a very high number and this can result in a grainy photo. The best option is to use a tripod and this should eliminate any camera shake, also note that touching the shutter button to take the shot can shake the camera slightly, so a remote shutter release or setting a timer is a good idea.
#2 Unfocused Photos
Knowing how to focus properly is key to a sharp photo so it’s important to first decide which subjects you want in focus and then choose the correct mode for the situation.
Single Shot Mode
This mode is best for stationary subjects so once you’ve selected this mode you simply press the shutter button down halfway and the camera will focus and stay locked on that point for as long as you keep the shutter half depressed. You can then recompose the photo without the focus point changing.
Continuous Focusing Mode
This mode is commonly used when shooting moving subjects and it works by focusing and refocusing as you follow the subject with your camera, and it will do this for as long as you keep the shutter button half depressed.
Auto Mode
This mode gives you the benefits of the other two modes and will decide the best way to focus, for example, if you’re tracking a moving subject it will keep this in focus but if you’re shooting a stationary subject and move the camera to recompose then it should stay focused on that subject. The camera does a good job at this but it’s not always as accurate as using single-shot or continuous focus modes.
Manual Mode
This mode isn’t as commonly used as the other modes because it’s hard to use and get it exactly right. Often it’s used for macro shots such as flower close-ups or in situations where the camera has trouble locking onto any specific point or if the camera locks onto the wrong point. Some professionals such as product photographer measure the distance between the lens and subject to calculate the most accurate focus, but usually, you can just use your eyes to judge this.
 #3 Wonky Photos
A slightly wonky photo isn’t always noticeable to everyone but can look bad if you get it right off. A wonky photo is when parts of your photo that should be level such as a horizon are slightly lower or higher on one side. There’s an easy way to remedy this and it’s to use the grid in the viewfinder or on-screen to line it up properly. But if you don’t notice your mistake until you get home then another option is using software such as Photoshop to straighten it.
#4 Overexposed and Underexposed Photos
As a beginner, you might not always be aware that your photos are too dark or light and sometimes you just won’t get it right. An overexposed photo is when the whites are too bright and all the details are lost in the highlights, while an underexposed photo is the opposite in which the blacks are too dark and details are lost in the shadows.
A correctly exposed photo wouldn’t appear too bright or dark and you’ll see all the details in both the shadows and highlights, similar to how you see the scene with your eyes. The best way to combat either of these situations is by using exposure compensation in which you can change the brightness in increments for example +1 and +2 to increase the brightness or -1 and -2 to darken the photo.
 #5 Bad Composition
Composition is one of the key elements to a dramatic photo and is a technique that even professional photographers continually work on. Learning some composition techniques is a good place to start and there’s many of these which you can research such as the rule of thirds, visual weight, balance and leading lines.
Here are a few common composition mistakes:
-Cutting off parts of your main subjects at the edge of the photo is something a lot of beginners won’t even notice until someone points it out, for example, you might cut out someone’s arm or the edge of a building.
-Cluttering your photos is also common because beginners think you need to include as much of the scene as possible, but most of the time this will confuse the viewer so they can’t focus on any one point in the photo.
-Not including any key subjects and just filling the frame with everything and anything will leave you with a boring photo most of the time, so try to include some points of interest to keep the viewer’s attention for longer.
#6 Learn How to Use Your Camera
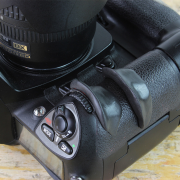
If you’re using a DSLR then you’ll need to learn what all the settings do, and it’s important to research and test out all the settings to get as much as you can out of your camera. Some of the basic elements you need to know about for a start are shutter speed, aperture, ISO, exposure and focus as a rough guide.
#7 Overprocessing Your Photos
Editing your photos is something you’ll likely try out at some point and you’ll find most professionals tweak their photos to some degree. Going overboard with this is common if you’re just starting out and you can end up with fake, unrealistic looking photos as a result, so check out other photographers techniques and don’t tweak more than you need to.

#8 Check Your Photos
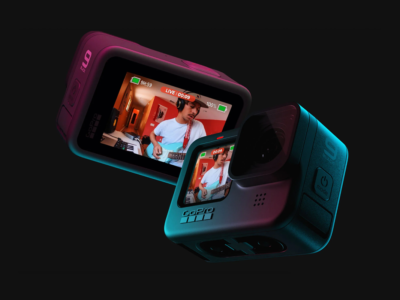
Every photographer makes this mistake at some point by either not checking the photo after taking it or not analysing it enough for things such as sharpness and focus points etc. Often you won’t notice some mistakes until you view it on a big screen though so try zooming in on your camera screen to see these details.
Jake Turner has over 10 years of experience in photography and a passion for shooting in black and white. Check out his website at Monoimages


Comments